How to connect Google Forms to Email for Trello with Zapier
Get your Google Form submissions into Trello so that your team can collaborate on incoming enquiries with SendBoard’s Email for Trello.
Google Forms is the go-to free tool for creating simple website contact forms. But if you’re looking to get the data from your submitted Google Form into Trello AND you want to be able to reply to these incoming messages via email… it suddenly doesn’t seem so simple!
Using another form tool? Here’s how to connect a website contact form to Trello. We cover Wufoo, Squarespace, Gravity Forms and Typeform.
While Google Forms can (with the help of an add-on) send you a notification email as soon as someone submits your form, the collected data is not included in the email message. You have to open the spreadsheet to see all the responses. Not very convenient! It’s pretty time-consuming to respond if you need to manually extract the information from your Google Sheet before typing up an email to your customer.
We’ll show you how to connect Google Forms to Email for Trello using Zapier, so that your team can collaborate on replying to incoming form submissions in Trello itself. Once you’ve gone through the steps below, you’ll have:
A Google Form that collects responses in a spreadsheet.
Each new response in your Google Form will create a new Trello card.
The customer who filled out your form will receive an email to confirm receipt of their message.
You will be able to continue the discussion via email from within Trello.
There are a lot of steps to follow but don’t be put off! Once everything is set up, it’s an elegant solution that will save you time in the long run.
How can we connect Google Forms to Trello?
Zapier is a flexible and versatile tool to connect different apps – in this case, we’ll use it to get Google Forms and Trello talking to each other. If you’re just getting started with Zapier, a free account will allow you to create one Zap (their term for automation) that can run 100 times per month.
1. Set up your Google Form
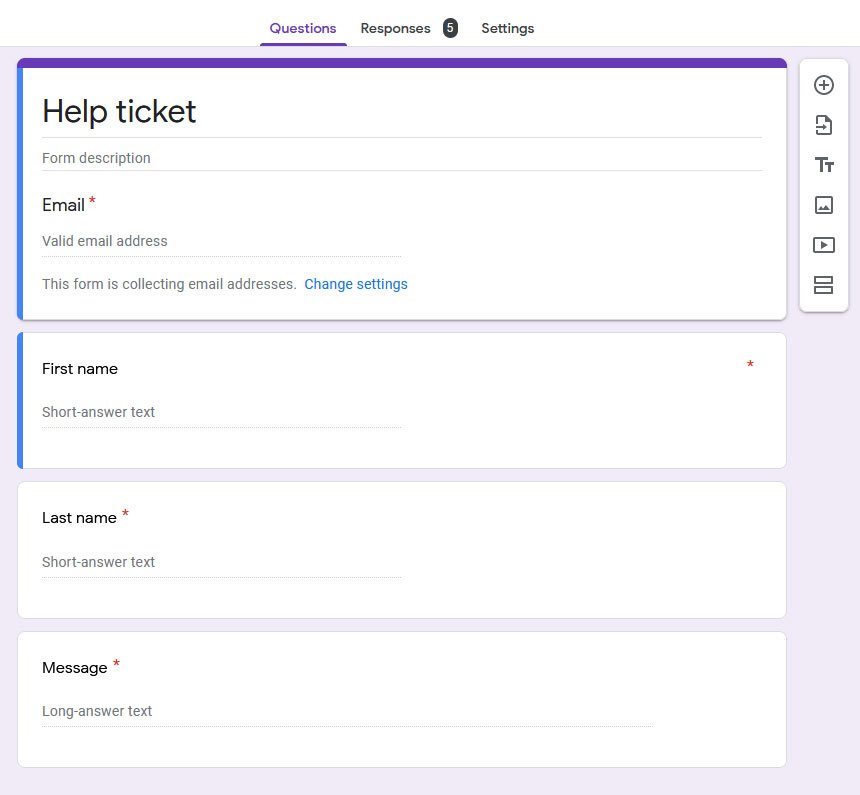
If you already have a Google Form, that’s great! If not, it’s very easy to set one up. We created a simple ‘Help ticket’ form that collects our customer’s first name, last name, email address and enquiry.
Remember, every Google Form is linked to a spreadsheet. To view your form responses, navigate to the ‘Responses’ tab to access the sheet.

2. Create a new Zap
In your Zapier account, set up a new Zap. We’re going to create a new card in Trello every time a new response is submitted in your Google Form.
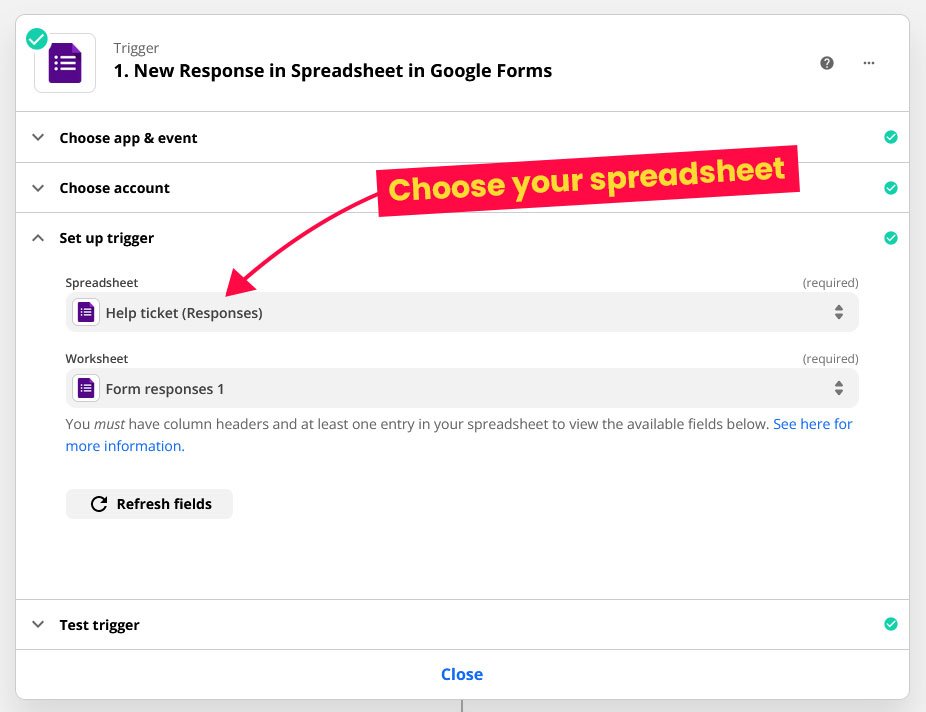
The trigger for your action will be a new response in your Google Forms spreadsheet. To set up your trigger, simply choose the spreadsheet that your form responses are being saved to.
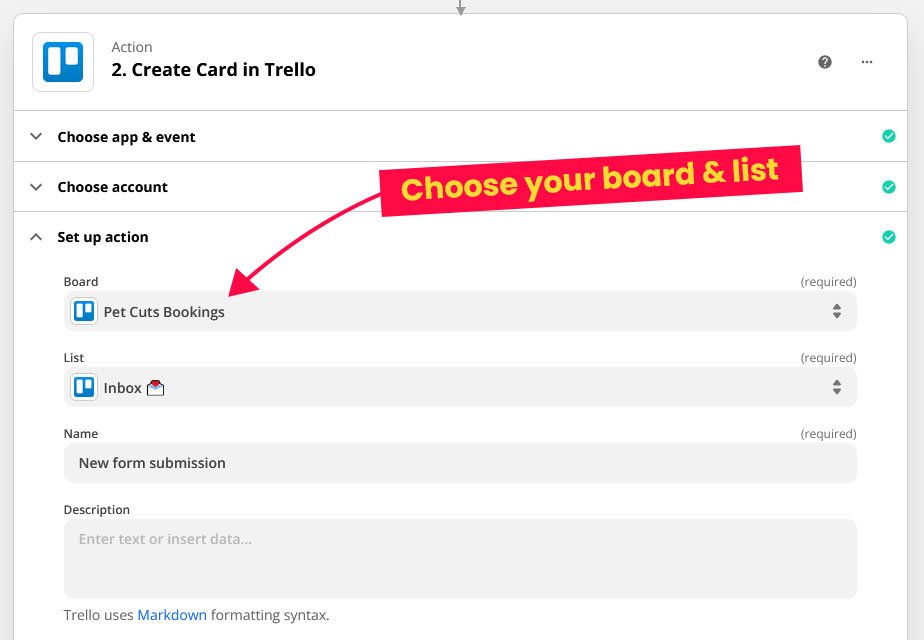
The action that your Zap will perform is creating a card in Trello. For now, simply choose the board and the list that you would like to add your card to.
Then save and test your Zap. This simple action will create a new card on your Trello board.
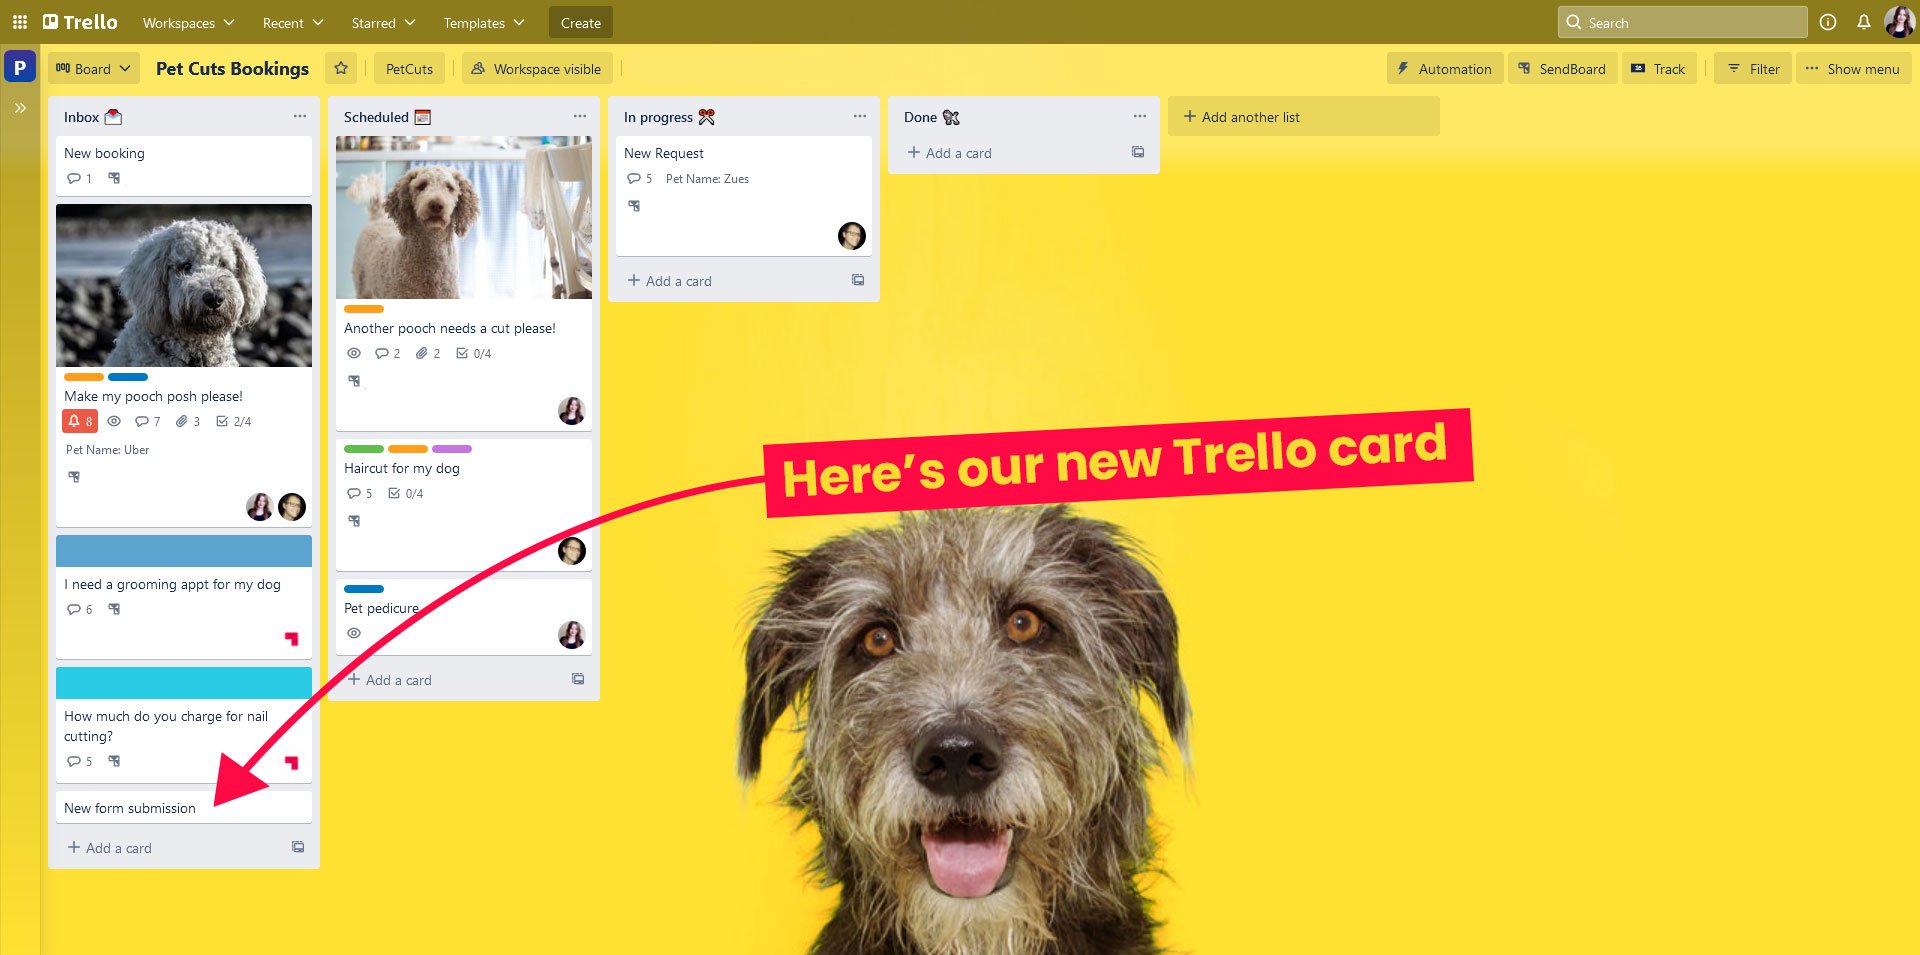
However, you will notice that the card has no information from the Google Form submission attached to it. We want to be able to collect our customer’s email address and their message – and see it on this Trello card. Let’s set Trello up so that we can tell Zapier what information we want to appear on this card.
3. Set up a custom field in Trello
Create a custom field for each Google Form field you want to bring into Trello. For this example, we will keep it simple and create one new custom field for our customer’s email address.

In addition, we will also create a new label called ‘Google Form’. Don’t assign it to your card, just create the label. You’ll see why later! Our example uses the red label, but you can use any available color.

4. Customize your Zap
Back in Zapier, edit your action to insert the data from Google Forms into Trello. We’re going to insert our customer’s message as the card description, apply the red ‘Google Forms’ label, and insert our customer’s email address into our newly created custom field.

Test your Zap again. Now we have a new Trello card labeled ‘Google Forms’ with the customer’s email address in a custom field and their message in the description.
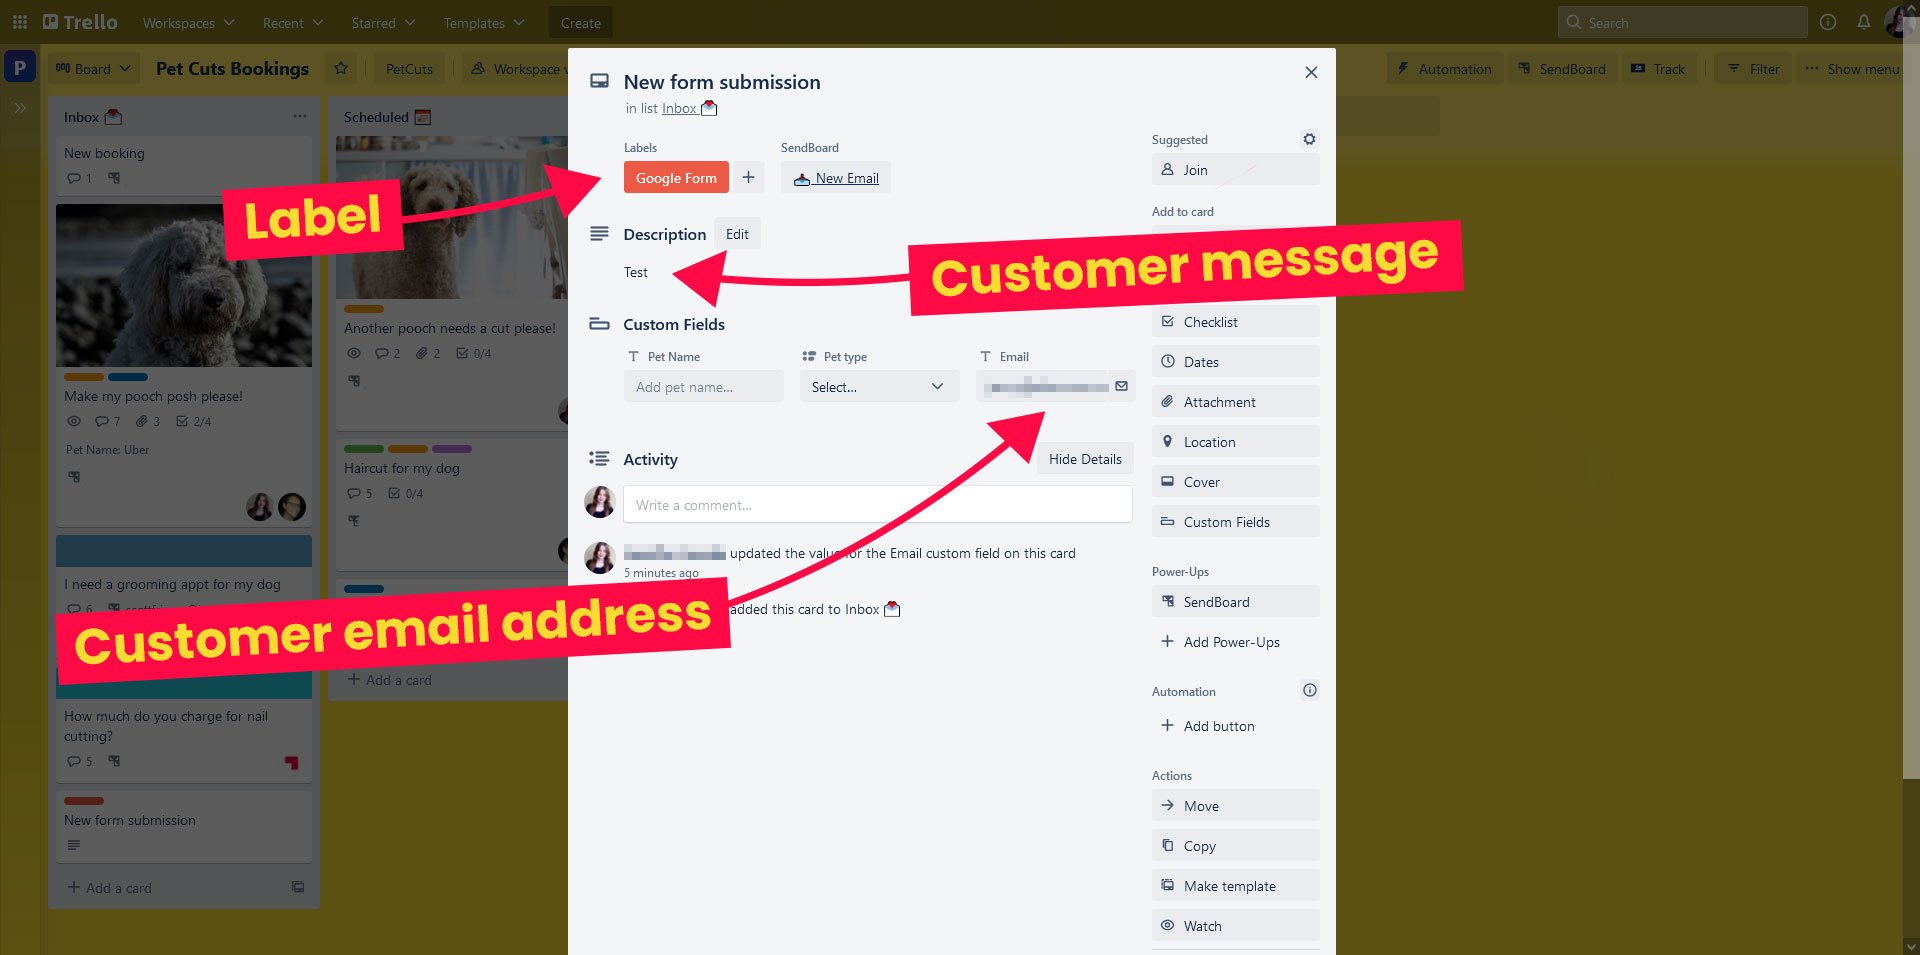
However, the card has not come into Trello as an email, so we can’t use Email for Trello to reply. We could manually type out a new email to our customer, but we want this integration to be as seamless as possible. To help us out, let’s turn to automation.
5. Automate a reply to your customer
Create a Saved Reply
We’re going to send our customer an email as soon as they submit a response in our Google Form. This email can be anything you like!
We have set up a Saved Reply called ‘autoreply’ that simply acknowledges receipt of the customer’s message and gives them a turn around time. Below this message, we have used the variable for the card description to insert a copy of the enquiry our customer sent to us. Remember, our Zap inserts our customer’s message into the card description on Trello!

You can read more about how to include variables in your Saved Replies in our help center.
Automatically send your Saved Reply
Create a rule in Trello that is triggered when the red ‘Google Form’ label is added to a card. Expressed in other terms, this is what happens when Zapier creates a new card on our Trello board.
Once the trigger is met, there are two actions the automation will perform:
Our automation is going to post a comment to the card. This comment will send an email to the customer email address contained in our custom field, effectively turning the card that Zapier has created into an email card. The email that the automation sends is the Saved Reply we’ve just created.
Then the automation will remove the red ‘Google Form’ label from the card, as it is no longer needed.

Now, when Zapier adds a Google Form submission card to Trello, your customer gets acknowledgement of receipt and you transform your normal Trello card into an Email for Trello card!

By including the customer’s message as part of the auto-reply, all communication is contained within the same email thread. It also leaves you free to delete or change the card description, without losing context or important information about your customer’s original query.
You did it!
Phew, thanks for sticking with us! Now your team can communicate back and forth with customers via email, without having to leave Trello or check for details on your Google Form spreadsheet!