How to connect a contact form to Trello

If you’re receiving emails or help tickets through a third-party contact form, make sure nothing slips through the cracks! Organize all your email communication in one place with Email for Trello.
Although contact forms provide a seamless point of contact for your customer, the resulting notification emails can be difficult to manage. By creating a Trello card for each form submission, Email for Trello makes it easy to stay organized, respond faster and keep customers happy. No more sorting through hundreds of form submissions with the same, unhelpful subject line!
We take a look at four major form providers and show you how to connect those incoming enquiries to Trello. In all instances, the process is very similar – you are simply sending the form to your Email for Trello board address. When a customer submits your form, their enquiry will come straight into Trello as an email card. The key idea is that you can reply to the message directly from Trello. From there, you also have all the other tools you need at your disposal. You can rename cards, share the workload with team mates, edit your customer’s contact details and automate your responses.
We cover Wufoo, Squarespace, Gravity Forms and Typeform below, but if you use a different contact form on your website, Zapier is a great alternative way to connect any online form to email (and other apps). We’ll take a closer look at how to do this with Google Forms in a future article.
Let’s dive in!
Wufoo
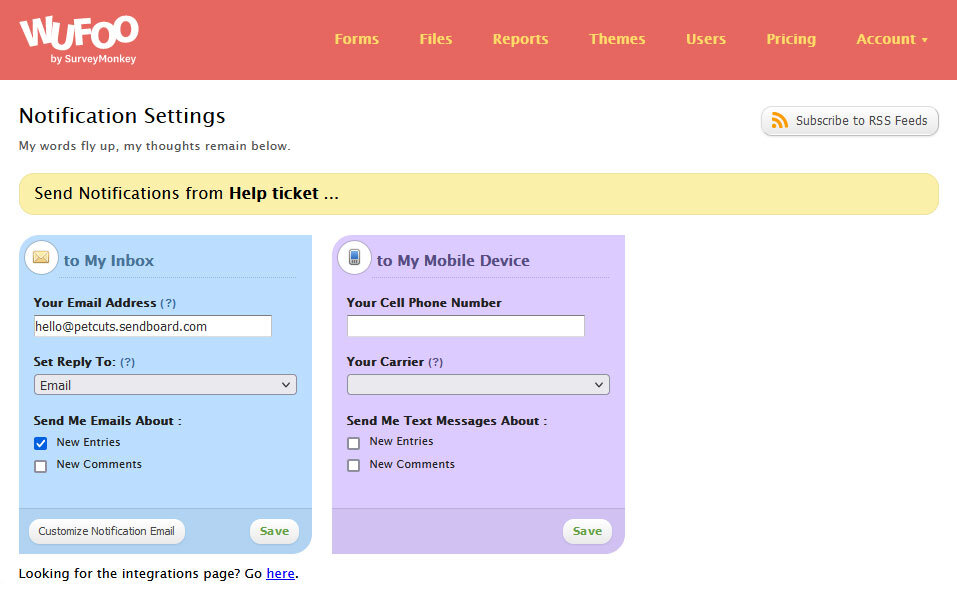
Create and edit your form in Wufoo as needed. Ours is a simple help form collecting first name, last name, email address and message. Under form settings, set up your notifications.

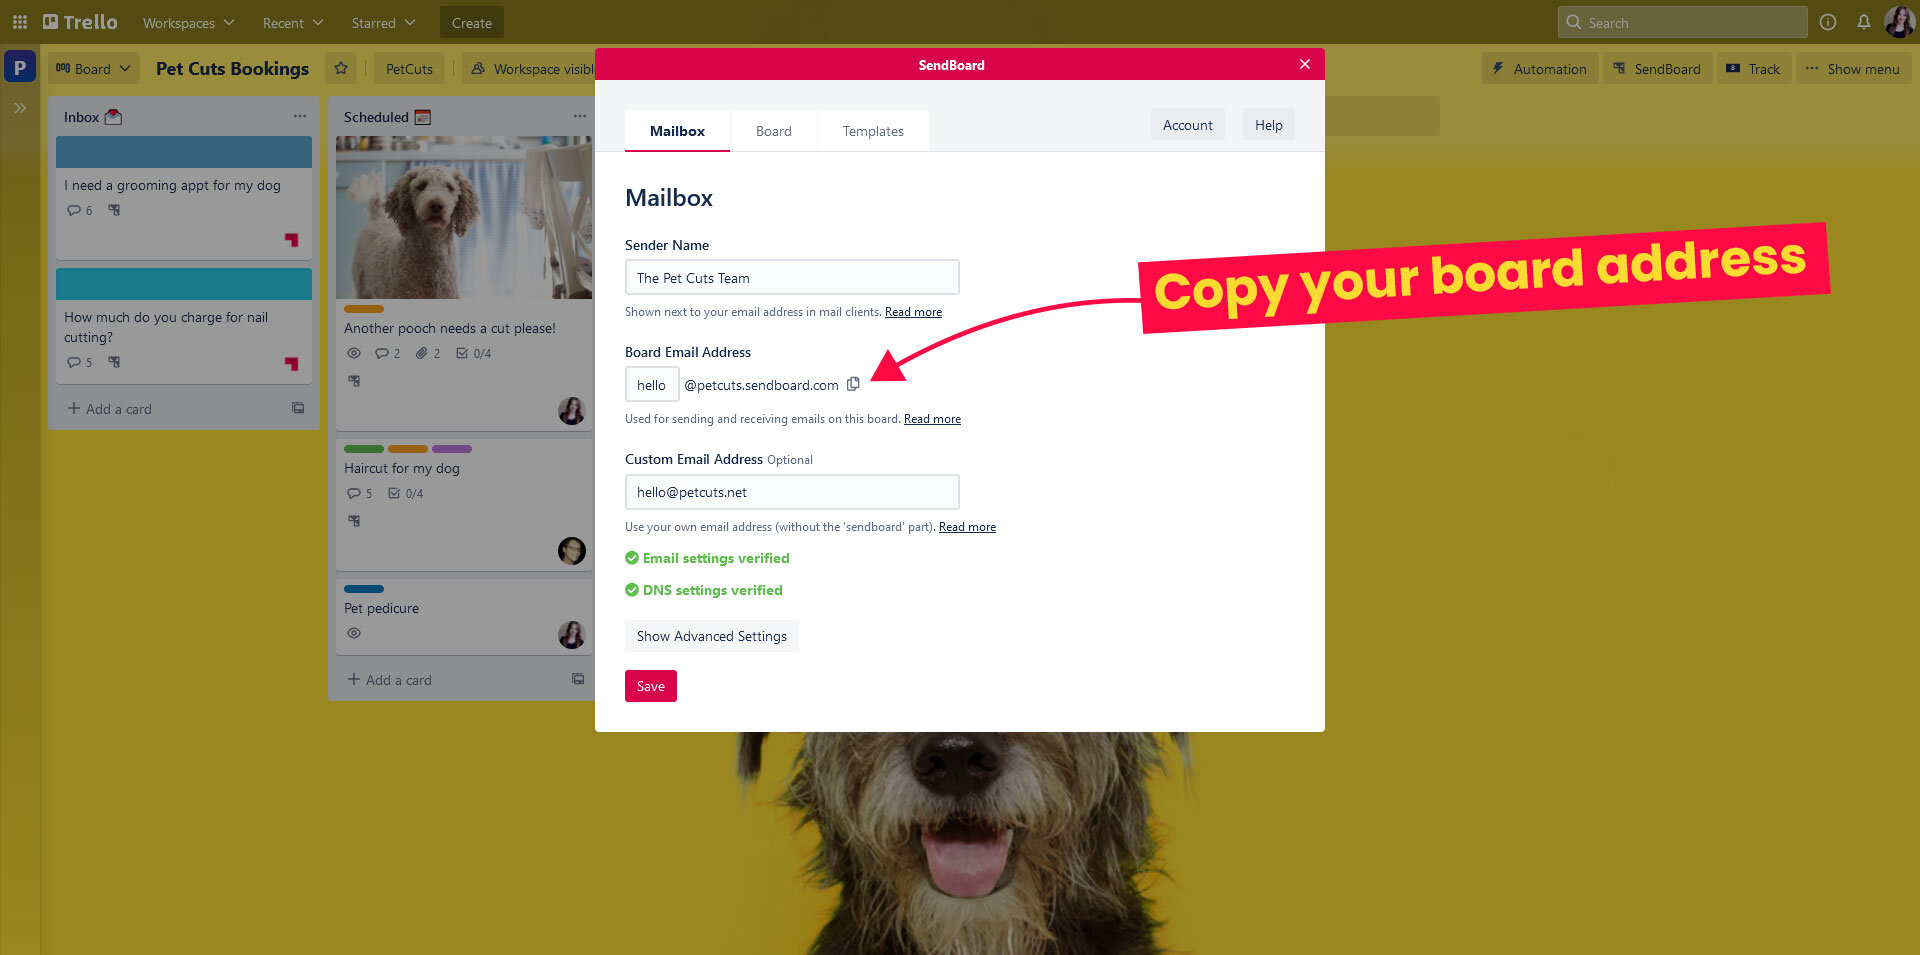
Copy your Email for Trello board address. You can find it under the SendBoard settings menu in Trello. If you have a custom email address already set up, you can use that too.
Paste this email address into your Wufoo form settings. Be sure to set the reply-to field to ‘Email’. This will use the email field in your form so that any replies you send from Trello will go to the email address of the customer who filled out your form.
And here’s what the submitted form looks like in Trello! The card automatically receives the same name as the subject line, which in this case is the name of the Wufoo form followed by the submission number. You can give the card a better, more contextual name that makes sense for your team.

Squarespace
When you set up your Squarespace form, set the submission email address under ‘Storage’ to your board address.

That’s it! All Squarespace form submissions will now automatically arrive as new cards in Trello. The enquiry email enters your workflow and is available to all team members to collaborate on.

Gravity Forms
If you run a WordPress site, Gravity Forms is a powerful and popular choice for contact forms. Once you’ve created your form, simply click ‘Edit’ then ‘Notifications’ to choose where you’d like your form submissions to be sent. Under ‘Send To Email’ enter your board address to receive your enquiries as emails in Trello.

Gravity Forms gives you a lot of control over how the incoming form submission will look in your inbox. For example, you can dynamically generate the From Name, From Email Address and Reply-To Email Address based on the data your customer enters into the form. Get more help with merge tags in Gravity Forms in their help database.
It saves a lot of time to have the correct customer information pulled into Trello when the form is submitted. But if you need to edit your customer’s details once they are already in Trello, never fear! Read more about editing contacts in Email for Trello in our help center.
Typeform
Lastly, let’s have a look at connecting Typeform to Trello. Once you’ve created your form, choose Notifications under your Typeform settings.
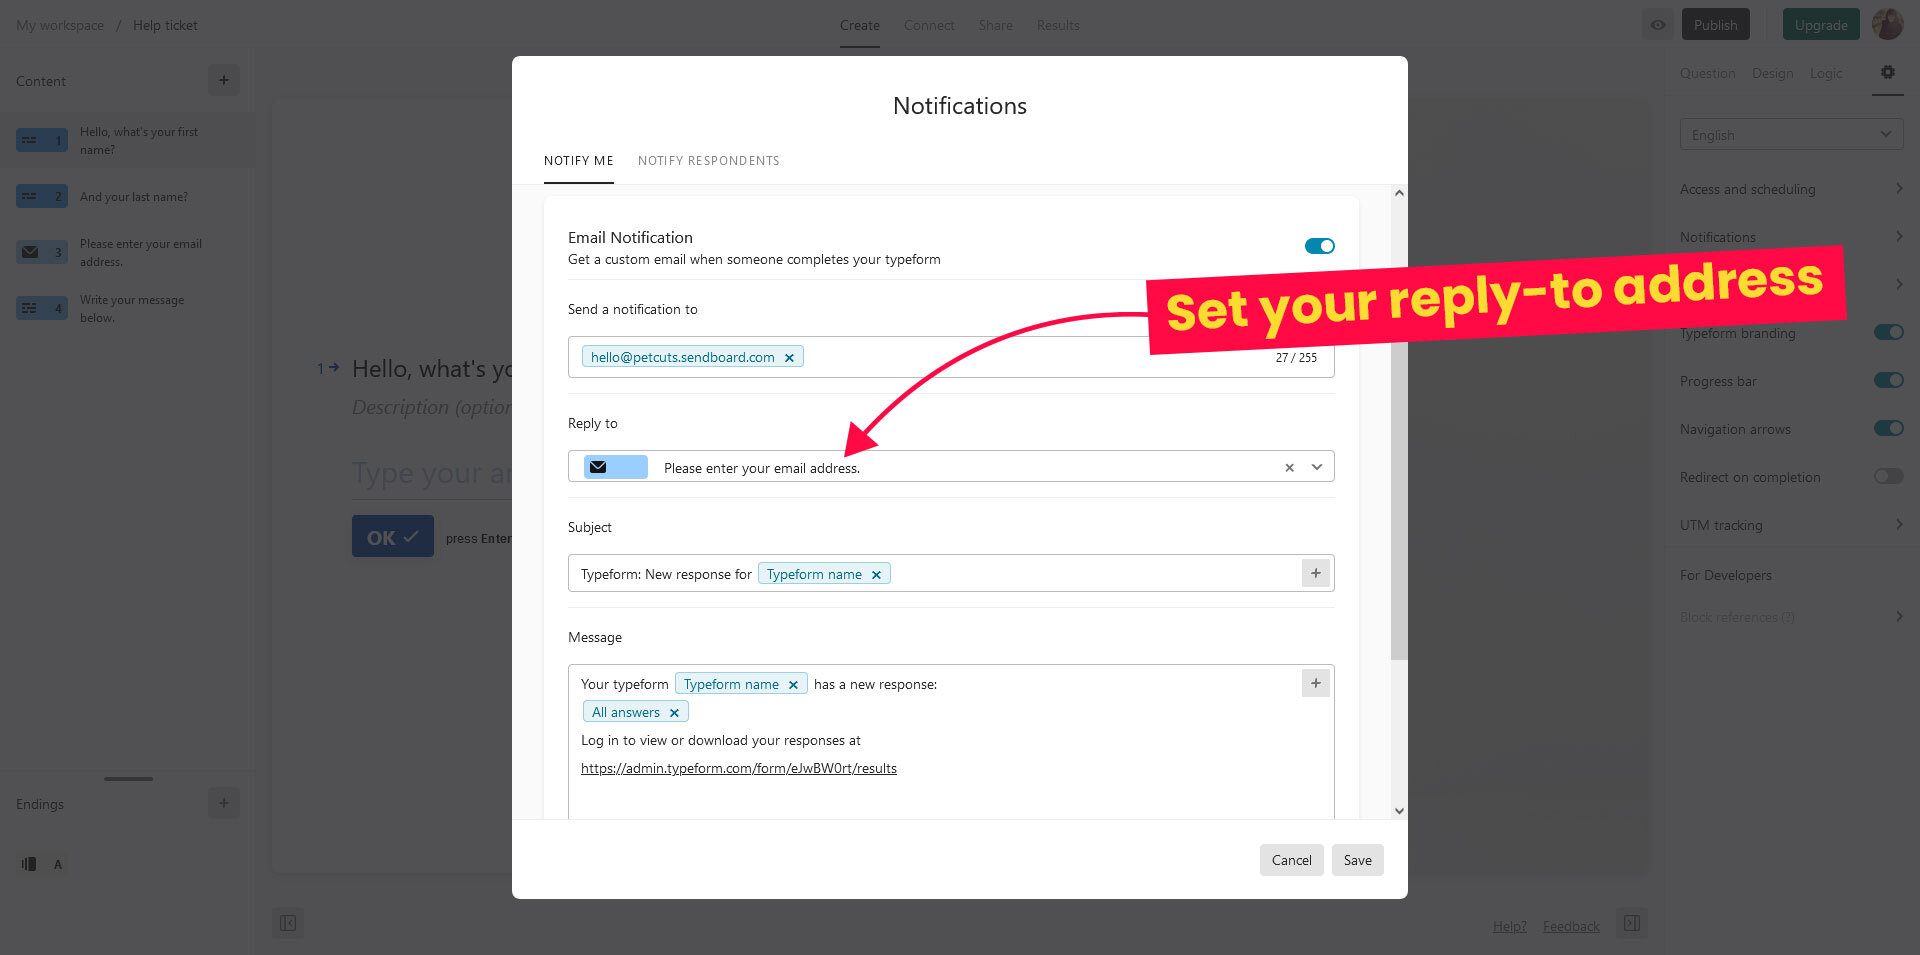
Set your notification email as your board address and set your reply-to address as the email address that your customer has provided. In this example, this is the field labelled ‘Please enter your email address’ – it will be dynamically populated with your customer’s details.
Incoming form submissions will now land in your Trello workflow as email cards, ready for your team to tackle.

If you have any active automations in Email for Trello, they will continue running smoothly regardless of whether the message comes directly from an email address or via a third-party contact form.
For example, if your team’s shared inbox has an auto-reply, it will still be sent out to the email address provided by your customer. See below for how it looks and check out our tips on how to create a great auto-reply for some inspiration on how to make your own.

Get connected!
Get work out of your inbox and into Trello! By connecting your contact forms to Email for Trello, your team can easily manage incoming enquiries, collaborate on email tasks and get more done.